1.0 Download project
git clone http://oauth2:{token}@{host}/{user}/{project} {dir_folder}
download project to target server
2.0 Install gitlab runner
https://docs.gitlab.com/runner/install/linux-repository.html
有几種方法安裝gitlab runner。
簡單的,直接用apt-get安裝。複雜的,把gitlab runner部署到docker container里。
因是本地Server,所以用簡單的apt-get安裝。
sudo curl -L "https://packages.gitlab.com/install/repositories/runner/gitlab-runner/script.deb.sh" | sudo bash
sudo apt-get install gitlab-runner
download & install gitlab runner
3.0 Register gitlab runner
https://docs.gitlab.com/runner/register/
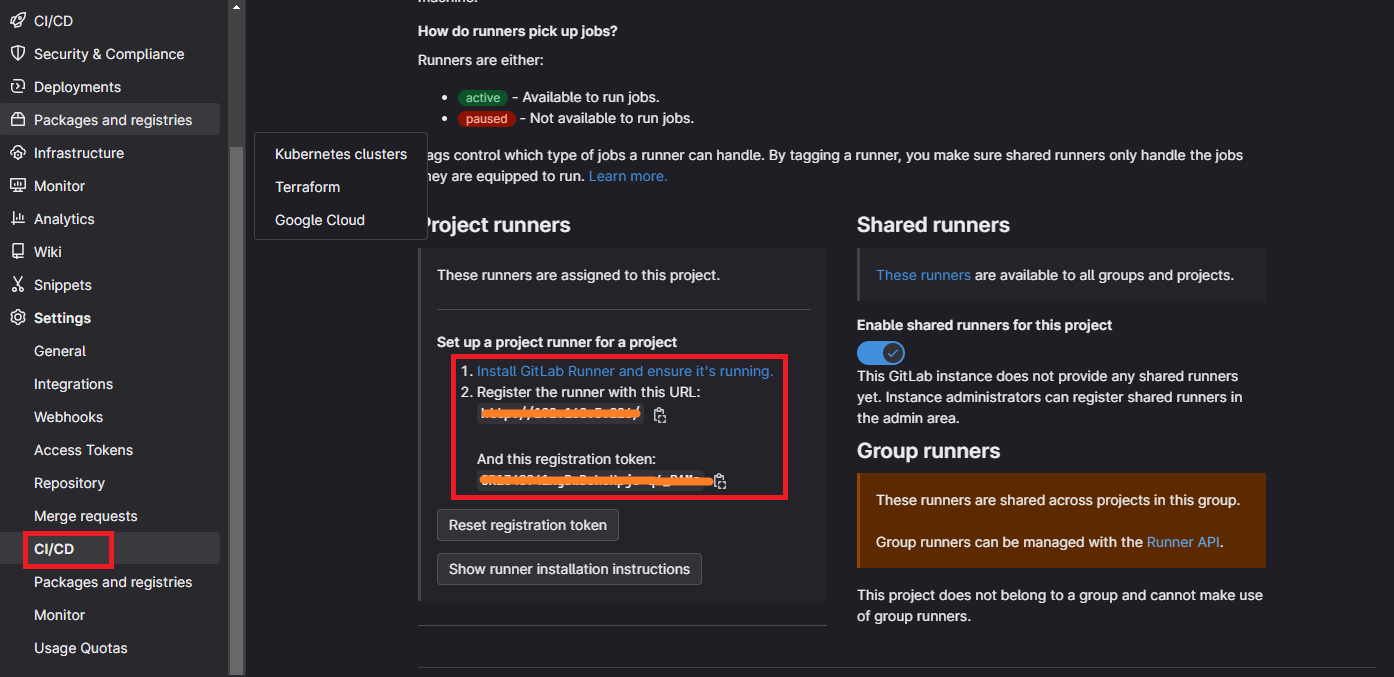
Go to project -> Setting -> CI/CD -> Runners
Copy {URL} & {TOKEN}
sudo gitlab-runner register
{URL}
{TOKEN}
shell
進入register,依次輸入{URL},{TOKEN},shell (即在本地服務器運行)。
sudo vi /etc/gitlab-runner/config.toml
註冊表
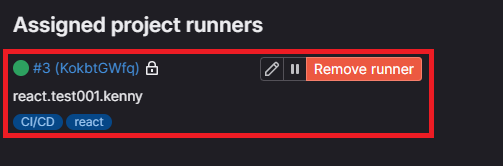
成功註冊
4.0 CI/CD Pipline (.gitlab-ci.yml)
Go to CI/CD -> Editor
stages:          # List of stages for jobs, and their order of execution
  - build
  - test
  - deploy

build-job:       # This job runs in the build stage, which runs first.
  stage: build
  script:
    - echo "Compiling the code..."
    - echo "Compile complete."
    - git pull origin main

unit-test-job:   # This job runs in the test stage.
  stage: test    # It only starts when the job in the build stage completes successfully.
  script:
    - echo "Running unit tests... This will take about 5 seconds."
    - sleep 5
    - echo "Code coverage is 90%"

lint-test-job:   # This job also runs in the test stage.
  stage: test    # It can run at the same time as unit-test-job (in parallel).
  script:
    - echo "Linting code... This will take about 5 seconds."
    - sleep 5
    - echo "No lint issues found."

deploy-job:      # This job runs in the deploy stage.
  stage: deploy  # It only runs when *both* jobs in the test stage complete successfully.
  environment: production
  script:
    - echo "Deploying application..."
    - echo "Application successfully deployed."
    - docker stop react_trial
    - docker rm react_trial
    - docker run --name react_trial -d -p 8080:8080 react/trial:1.0
Gitlab Template。
| Code | Desciption |
| git pull origin main | pull project source code |
|
docker stop react_trial docker rm react_trial docker run --name react_trial -d -p 8080:8080 react/trial:1.0 |
restart docker container |
在Template加了4行代碼。簡單地pull project & restart docker container。
5.0 Docker container (Node React App, Nginx)
https://javascript.plainenglish.io/how-to-serve-a-react-app-with-nginx-in-a-non-root-docker-container-cbc4c6acc177
FROM node:18.12.1-buster-slim AS builder

WORKDIR /app
COPY package.json package-lock.json ./
COPY public/ public/
COPY src/ src/
RUN npm ci
RUN npm run build

FROM nginx:1.23.2-alpine
COPY nginx.conf /etc/nginx/conf.d/default.conf
COPY --from=builder /app/build /usr/share/nginx/html
RUN touch /var/run/nginx.pid
RUN chown -R nginx:nginx /var/run/nginx.pid /usr/share/nginx/html /var/cache/nginx /var/log/nginx /etc/nginx/conf.d
USER nginx
EXPOSE 8080
CMD ["nginx", "-g", "daemon off;"]
Dockerfile。是node react app的image。
server_tokens off;
server {
    listen       8080;
    server_name  localhost;
    location / {
        root   /usr/share/nginx/html;
        index  index.html index.htm;
        try_files $uri /index.html;
    }
}
創建nginx.conf。是nginx的config。
docker build -t react/trial:1.0 .
docker run --name react_trial -d -p 8080:8080 react/trial:1.0
build & run.
Go to 127.0.0.1:8080 & enjoy.
6.0 Auto trigger CI/CD pipline
不用指定branch也可trigger CI/CD pipeline。
7.0 Completed

只要merge branch,就會trigger CI/CD pipeline自動deploy。