SpriingCache 实现了基于注解的缓存功能,只需要在方法上添加注解即可实现常用的缓存功能,大大简化了的业务代码的实现。SpringCache 默认集成于 SpringContext 中,这意味着对于使用 SpringBoot 框架来说,不需要引入额外的 jar 包即可使用。
SpringCache 通过 CacheManager 接口来统一不同的缓存技术,底层可以切换不同的 cache 实现。默认采用 ConcurrentMapCacheManager 实现缓存功能。如果想使用 Redis 作为缓存,只需要在 Springboot 程序中引入 Redis 的起步依赖即可自动切换到 RedisCacheManager。
下面就让我们体验一下 SpringCache 的具体功能吧,在博客的最后会提供源代码下载。
一、搭建工程
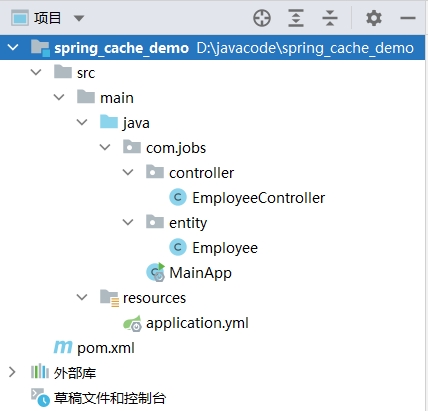
搭建一个 SpringBoot 程序,结构如下所示:
pom 文件的具体内容如下:
<?xml version="1.0" encoding="UTF-8"?>
<project xmlns="http://maven.apache.org/POM/4.0.0"
         xmlns:xsi="http://www.w3.org/2001/XMLSchema-instance"
         xsi:schemaLocation="http://maven.apache.org/POM/4.0.0
         http://maven.apache.org/xsd/maven-4.0.0.xsd">
    <modelVersion>4.0.0</modelVersion>
    <parent>
        <groupId>org.springframework.boot</groupId>
        <artifactId>spring-boot-starter-parent</artifactId>
        <version>2.7.10</version>
    </parent>

    <groupId>com.jobs</groupId>
    <artifactId>spring_cache_demo</artifactId>
    <version>1.0-SNAPSHOT</version>

    <properties>
        <java.version>1.8</java.version>
    </properties>

    <dependencies>

        <dependency>
            <groupId>org.springframework.boot</groupId>
            <artifactId>spring-boot-starter-web</artifactId>
            <scope>compile</scope>
        </dependency>

        <dependency>
            <groupId>org.projectlombok</groupId>
            <artifactId>lombok</artifactId>
            <version>1.18.20</version>
        </dependency>

    </dependencies>
    <build>
        <plugins>
            <plugin>
                <groupId>org.springframework.boot</groupId>
                <artifactId>spring-boot-maven-plugin</artifactId>
            </plugin>
        </plugins>
    </build>
</project>
可以发现除了 web 实现必须要引用的 spring-boot-starter-web 起步依赖和 lombok 之外,没有引入额外的 jar 包。其中 lombok 不是必须要引入的,之所以引入是为了简化实体对象的创建,以及使用其 lombok 自带的日志打印功能。
本博客的 Demo 使用的实体类 Employee 细节如下:
package com.jobs.entity;

import lombok.Data;
import java.io.Serializable;

//每个实体类,最好实现 Serializable 接口,否则可能会出错
@Data
public class Employee implements Serializable {

    private String name;

    private int age;
}
这里需要注意的是:所有实体类最好实现 Serializable 接口,比如对于大部分的 CacheManager 的实现是基于 jdk 的序列化,要求实体类必须实现 Serializable 接口,否则在使用 SpringCache 的过程中就会报错。
对于 application.yml 配置文件,内容很简单,只配置了启动端口,如下所示:
server:
  port: 8888
二、使用默认的缓存功能
SpringCache 是基于注解的缓存实现,常用的注解有:
- @EnableCaching 这个注解需要在 SpringBoot 启动类上添加后,才能使用 SpringCache 的其它注解
- @Cacheable 在方法执行前先查看是否有相应缓存,有则直接返回缓存,无则调用方法并将方法返回值放到缓存中
- @CachePut 方法执行完毕后,将结果添加到缓存中
- @CacheEvict 删除一条或所有缓存
首先我们需要在 SpringBoot 的启动类上,添加 @EnableCaching 注解。
package com.jobs;

import org.springframework.boot.SpringApplication;
import org.springframework.boot.autoconfigure.SpringBootApplication;
import org.springframework.cache.annotation.EnableCaching;

@EnableCaching
@SpringBootApplication
public class MainApp {
    public static void main(String[] args) {
        SpringApplication.run(MainApp.class, args);
    }
}
然后在 EmployeeController 中编写用于测试的接口,具体细节如下:
package com.jobs.controller;

import com.jobs.entity.Employee;
import lombok.extern.slf4j.Slf4j;
import org.springframework.beans.factory.annotation.Autowired;
import org.springframework.cache.Cache;
import org.springframework.cache.CacheManager;
import org.springframework.cache.annotation.CacheEvict;
import org.springframework.cache.annotation.CachePut;
import org.springframework.cache.annotation.Cacheable;
import org.springframework.web.bind.annotation.*;

import java.util.Random;

@Slf4j
@RequestMapping("/employee")
@RestController
public class EmployeeController {

    @SuppressWarnings("SpringJavaInjectionPointsAutowiringInspection")
    @Autowired
    private CacheManager cacheManager;

    //当接收到的参数封装的实体不为 null 时,添加缓存。(condition 表示满足条件时,对执行结果进行缓存)
    // key 不存在时,添加缓存,如果 key 存在时,则更新缓存
    // #emp.name 表示使用接收到的实体对象的 name 作为 key
    // #result.name 表示使用返回的结果对象的 name 作为 key
    //@CachePut(value = "employee", key = "#emp.name", condition = "#emp != null")
    @CachePut(value = "employee", key = "#result.name", condition = "#emp != null")
    @PostMapping
    public Employee addEmployee(@RequestBody Employee emp) {
        log.info("addEmployee 传入的参数:" + emp);
        if (emp != null) {
            return emp;
        } else {
            return null;
        }
    }

    //使用接收到的参数 name 作为 key
    //当返回结果不是 null 时,进行缓存。(unless 表示不满足条件时,对执行结果进行缓存)。
    //当 key 存在时,直接返回缓存中的数据
    @Cacheable(value = "employee", key = "#name", unless = "#result == null")
    @GetMapping("/{name}")
    public Employee getEmployee(@PathVariable String name) {
        log.info("getEmployee 传入的参数:" + name);
        if (name == null || name.length() == 0) {
            return null;
        } else {
            Employee emp = new Employee();
            emp.setName(name);
            emp.setAge(new Random().nextInt(100));
            return emp;
        }
    }

    //删除缓存,使用接收到的参数 name 作为 key 进行删除
    @CacheEvict(value = "employee", key = "#name")
    @DeleteMapping
    public void deleteEmployee(String name) {
        log.info("deleteEmployee 传入的参数:" + name);
    }

    //查看缓存(对于 Redis 来说,该方法不可用,
    //因为基于 redis 的 Cache 具体实现类,没有实现 Serializable 接口)
    @GetMapping("/cache")
    public Cache viewCache(String key) {
        Cache cache = cacheManager.getCache("employee");
        if (cache != null) {
            return cache;
        } else {
            return null;
        }
    }
}
这里需要注意的是:@Cacheable 、@CachePut、@CacheEvict 这些注解的 value 值表示的是缓存的类别。
然后启动 SpringBoot 程序,使用 Postman 工具模拟 http 请求接口来测试,想要查看缓存,可以请求 localhost:8888/employee/cache 接口进行验证,由于 SpringCache 默认使用 ConcurrentMapCacheManager 在内存中保存缓存数据,因此重启 SpringBoot 程序后,缓存就消失了。
三、使用 Redis 缓存
上面的代码不需要进行任何更改,只需要引入 Redis 的起步依赖,然后在 application.yml 增加 Redis 的配置即可。
1 在 pom 文件中添加 Redis 的起步依赖
<dependency>
    <groupId>org.springframework.boot</groupId>
    <artifactId>spring-boot-starter-data-redis</artifactId>
</dependency>
2 在 application.yml 中添加 Redis 的配置
spring:
  redis:
    host: 192.168.216.128
    port: 6379
    # redis 的连接密码,如果没有密码,可以省略
    password: redis123
    # redis 默认 16 个库,可选编号为 0 到 15,默认就是 0
    database: 0
  cache:
    redis:
      time-to-live: 1800000
然后继续使用 Postman 工具进行接口测试,此时直接在 Redis 中查看结果进行验证。
本篇博客的源代码下载地址:https://files.cnblogs.com/files/blogs/699532/spring_cache_demo.zip