一、需求背景
ES环境要从单机迁移到集群上面
现在已有的数据也要搬过去,有几个索引三四千万数据大概
二、实现方案
有两种,使用ElasticDump和LogStash的ES插件
1、ElasticDump迁移工具
相关资料
资料参考:
https://blog.csdn.net/weixin_43833817/article/details/110387932
https://zhuanlan.zhihu.com/p/489364187
脚本编写帮助参考:
https://blog.csdn.net/qq_39680564/article/details/118539979
官方NPM文档:
https://www.npmjs.com/package/elasticdump
下载安装迁移工具,windows 和linux无限制
npm install elasticdump -g
几个重要参数:
1、读取 + 写入 目标地址或者目标索引
--input
                    Source location (required)
--input-index
                    Source index and type
                    (default: all, example: index/type)
--output
                    Destination location (required)
--output-index
                    Destination index and type
                    (default: all, example: index/type)

2、指定每批次最大传输的文档对象数量
--limit
                    How many objects to move in batch per operation
                    limit is approximate for file streams
                    (default: 100)

3、指定读写的端口
--inputSocksPort, --outputSocksPort
                    Socks5 host port

--inputSocksProxy, --outputSocksProxy
                    Socks5 host address

4、强制版本?
--force-os-version
                    Forces the OpenSearch version used by elasticsearch-dump.
                    (default: 7.10.2)
5、处理版本?
--handleVersion
                    Tells elastisearch transport to handle the `_version` field if present in the dataset
                    (default : false)

6、是否忽略读写错误
--ignore-errors
                    Will continue the read/write loop on write error
                    (default: false)
--ignore-es-write-errors
                    Will continue the read/write loop on a write error from elasticsearch
                    (default: true)

6、帮助页面
--help
                    This page

7、重试次数与重试延迟时限
--retryAttempts
                    Integer indicating the number of times a request should be automatically re-attempted before failing
                    when a connection fails with one of the following errors `ECONNRESET`, `ENOTFOUND`, `ESOCKETTIMEDOUT`,
                    ETIMEDOUT`, `ECONNREFUSED`, `EHOSTUNREACH`, `EPIPE`, `EAI_AGAIN`
                    (default: 0)
--retryDelay
                    Integer indicating the back-off/break period between retry attempts (milliseconds)
                    (default : 5000)
传输命令:
- 无账户密码可不设置
- 注意传输限制到 -limit参数最高只能到查询的上限1万
- 如果不设置索引名称,默认将迁移整个ES过去
elasticdump --input=http://用户:密码@源ES地址/源索引 --output=http://用户:密码@目标ES地址/目标索引 --type=settings
elasticdump --input=http://用户:密码@源ES地址/源索引 --output=http://用户:密码@目标ES地址/目标索引 --type=mapping
elasticdump --input=http://用户:密码@源ES地址/源索引 --output=http://用户:密码@目标ES地址/目标索引 --type=data --limit=10000
工具特性分析:
1、方便快捷,只要装了Npm,不限制平台,客户端也能操作
2、应该是基于Http请求调用实现,数据传输量小,百万内的数据迁移时间还可以,千万的时间就很长了
2、LogStash的ES插件
关于插件的参数文档,太难找到了:
https://www.elastic.co/guide/en/logstash/7.3/plugins-outputs-elasticsearch.html
https://www.elastic.co/guide/en/logstash/7.3/plugins-inputs-elasticsearch.html
下载安装LogStash,需要部署在服务端
wget https://artifacts.elastic.co/downloads/logstash/logstash-7.3.2.tar.gz
解压放到目录中
# 解压Logstash包
tar -xf logstash-7.3.2.tar.gz

# 创建存放目录
mkdir /home/es

# 移动logstash到存放目录
mv logstash-7.3.2 /home/es/

# 重命名logstash目录
cd /home/es/
mv logstash-7.3.2/ logstash
LogStash只负责传输数据,索引不存在时会按ES默认配置新建
所以要保持源ES的索引配置,需要手动先在目标ES上建好
获取索引的配置信息:GET /索引名称/_settings?pretty
获取索引的Mapping信息:GET /索引名称/_mapping?pretty


在目标ES上配置索引
PUT /索引名称
{
  "settings": {
    "number_of_shards" : "8",
    "number_of_replicas" : "1"
  },
  "mappings" : {
    "properties" : { ... }
  }
}
编写迁移配置文件 xxx.conf:
vim /home/es/logstash/config/xxxx.conf
配置内容:
input{
    elasticsearch{
        hosts => ["源ES的IP地址:端口号"]
        index => "索引名称"
        user => "源ES用户名"
        password => "源ES密码"
    }
}

output{
    elasticsearch{
        hosts => ["目标集群ES的IP地址:端口号", "集群节点2", "集群节点3", ...]
        index => "索引名称"
        user => "集群ES用户名"
        password => "集群ES用户密码"
    }
}
迁移执行,指定迁移配置参数:
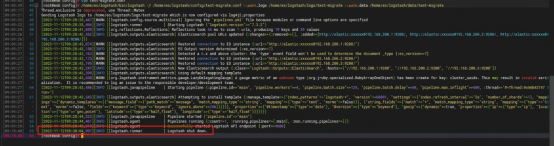
/home/es/logstash/bin/logstash -f /home/es/logstash/config/xxxx.conf --path.logs /home/es/logstash/logs/xxxx --path.data /home/es/logstash/data/xxxx
传输时不会打印传输信息,传输完毕时显示Logstash执行结束
工具特性分析:
1、一般来说是ELK一个整体,一定是在服务端部署的
2、传输速度快,支持千万级数据量
3、只负责传数据,索引本身是不管的,要手动去建好索引