centos7.9
32核64g200g2T
hostnamectl set-hostname o11g
echo "10.240.0.200 o11g" >>/etc/hosts
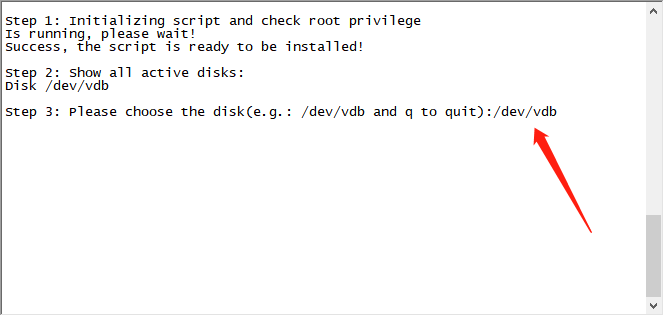
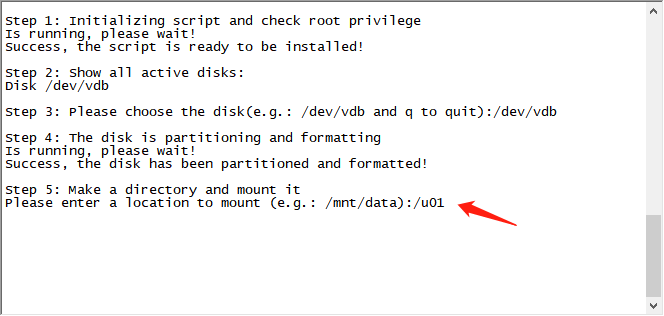
wget https://ecs-instance-driver.obs.cn-north-1.myhuaweicloud.com/datadisk/LinuxVMDataDiskAutoInitialize.sh
bash LinuxVMDataDiskAutoInitialize.sh
yum groupinstall -y 'Server with GUI'
yum install -y tigervnc-server
systemctl stop firewalld
systemctl disable firewalld
vim /etc/sysconfig/selinux #SELINUXTYPE=minimum
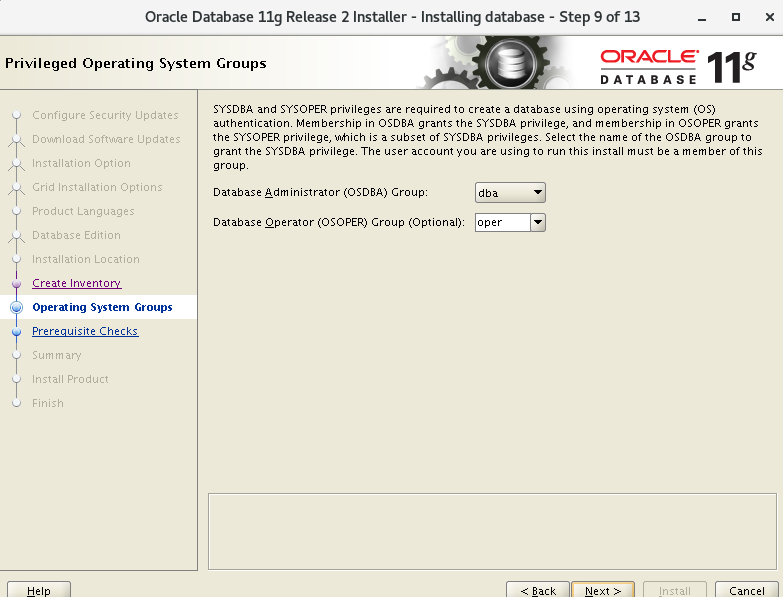
groupadd oinstall
groupadd dba
groupadd oper
useradd -g oinstall -G dba,oper oracle
echo redhat | passwd --stdin oracle
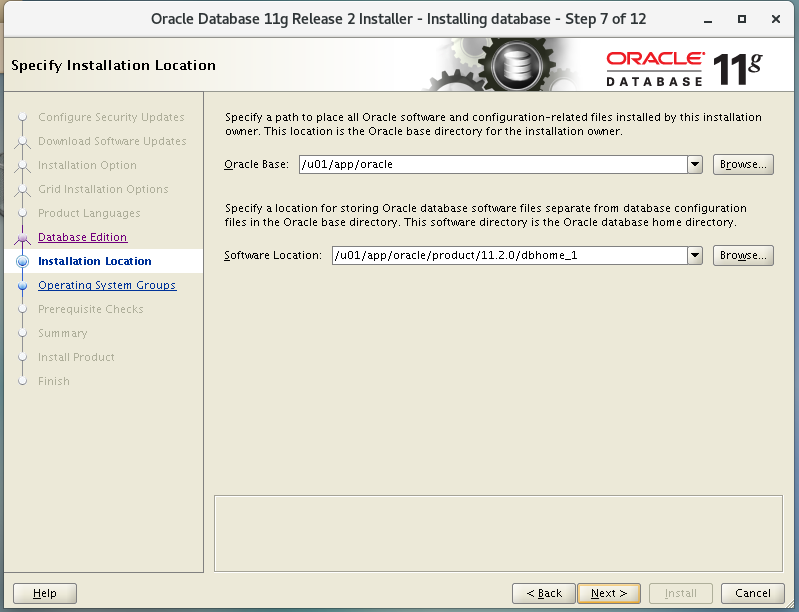
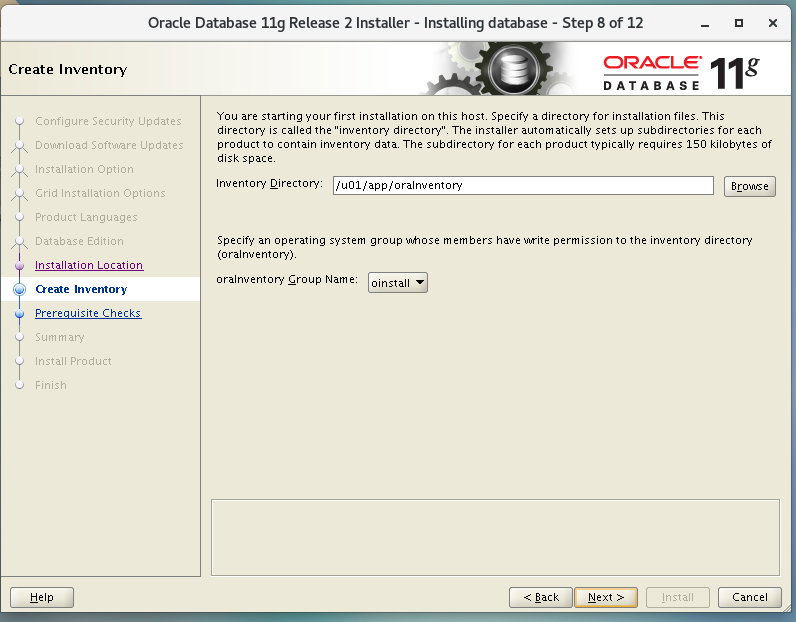
mkdir -p /u01/app
chown -R oracle.oinstall /u01/app
chmod -R 775 /u01/app
cd /
wget p13390677_112040_Linux-x86-64_1of7.zip
wget p13390677_112040_Linux-x86-64_2of7.zip
unzip p13390677_112040_Linux-x86-64_1of7.zip
unzip p13390677_112040_Linux-x86-64_2of7.zip
dd if=/dev/zero of=/swap bs=1M count=17384
mkswap /swap
vim /etc/sysctl.conf
vm.swappiness=60
sysctl -p
swapon /swap
echo "/swap swap swap defaults 0 0" >> /etc/fstab
reboot
su - oracle
vncpasswd #oracle
vncserver
然后vnc viwere连
oracle用户图形界面:
/database/runInstaller -jreLoc /etc/alternatives/jre_1.8.0

加入中文语言
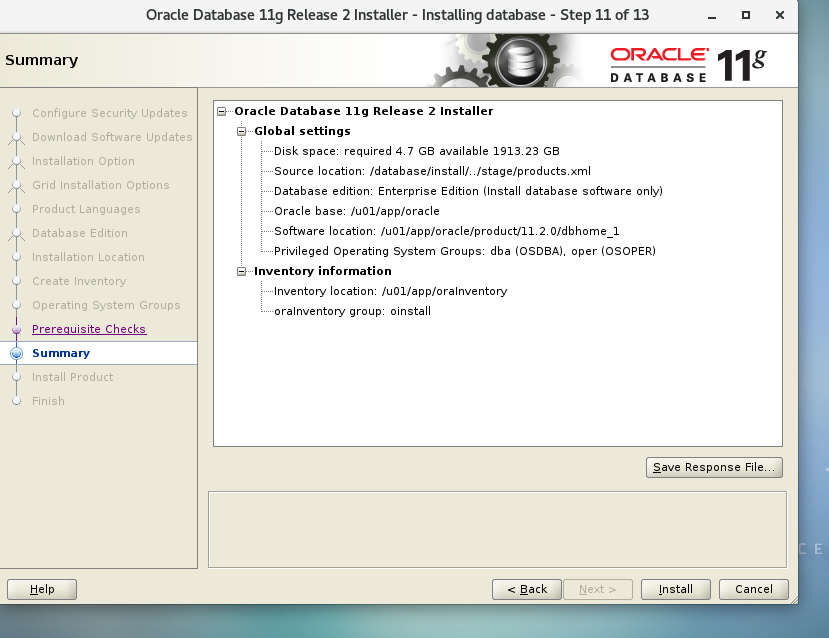
enterprise Edition
root用户执行:
yum install gcc libaio-devel compat-libstdc++-33 elfutils-libelf-devel glibc-devel glibc-headers gcc-c++ libstdc++-devel pdksh
wget -O /tmp/pdksh-5.2.14-37.el5_8.1.x86_64.rpm http://vault.centos.org/5.11/os/x86_64/CentOS/pdksh-5.2.14-37.el5_8.1.x86_64.rpm
rpm -ivh /tmp/pdksh-5.2.14-37.el5_8.1.x86_64.rpm
点fix and Check again:
root用户执行修复程序:
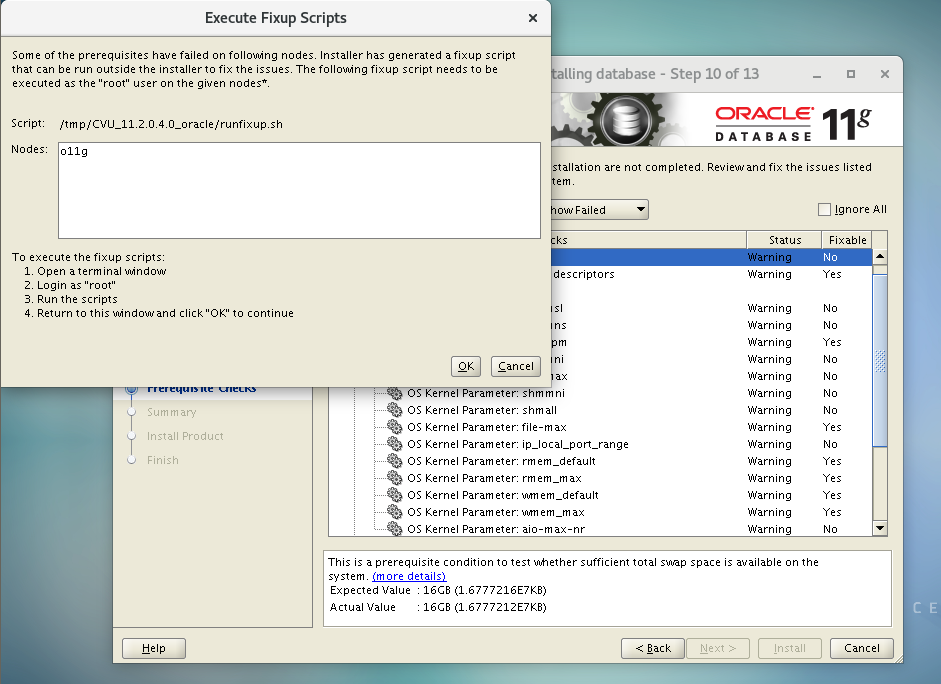
root执行完,再点ok
然后点ignore
点install
安装中碰到报错:
vi /u01/app/oracle/product/11.2.0/dbhome_1/sysman/lib/ins_emagent.mk
$(MK_EMAGENT_NMECTL) -lnnz11
然后点retry
最后用root执行两个脚本:
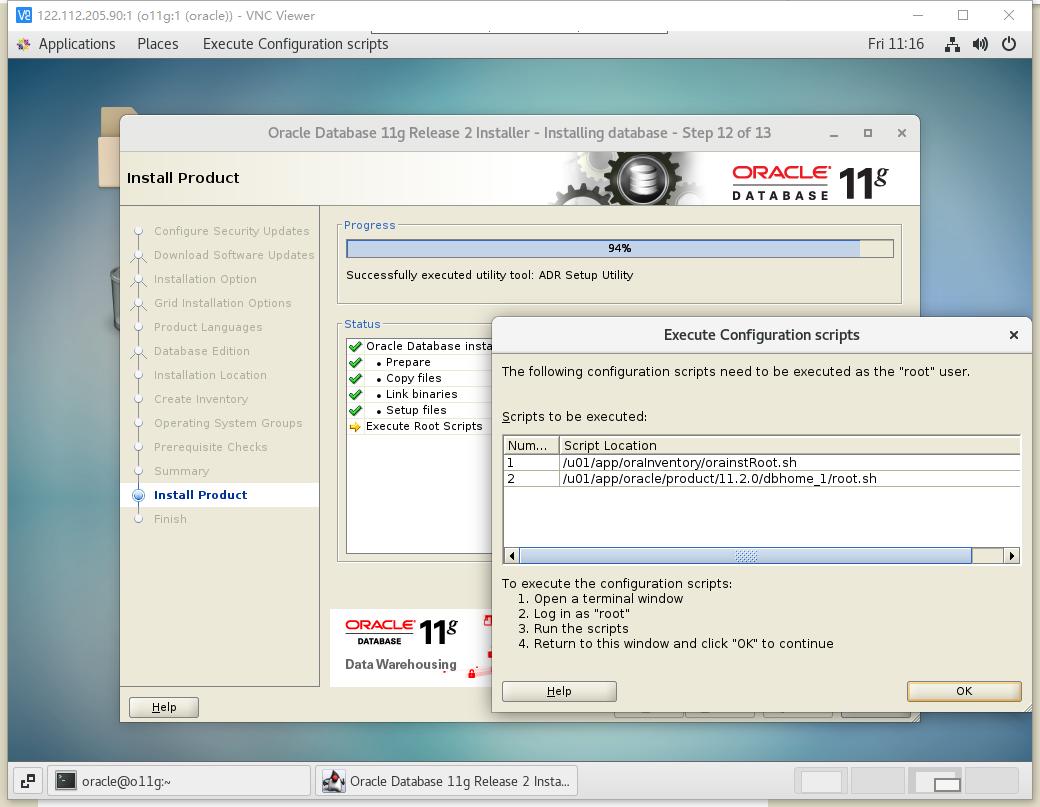
bash /u01/app/oraInventory/orainstRoot.sh
bash /u01/app/oracle/product/11.2.0/dbhome_1/root.sh
安装完成
oracle 用户执行:
vim ~/.bash_profile
export ORACLE_BASE=/u01/app/oracle
export ORACLE_HOME=$ORACLE_BASE/product/11.2.0/dbhome_1
export PATH=$ORACLE_HOME/bin:$PATH
source .bash_profile
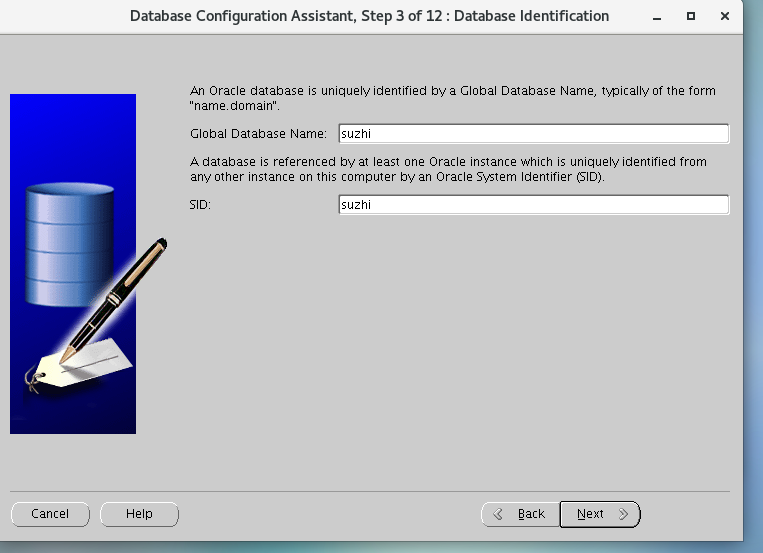
图形界面oracle用户登录,使用dbca创建数据库:
sid :suzhi
em没打勾
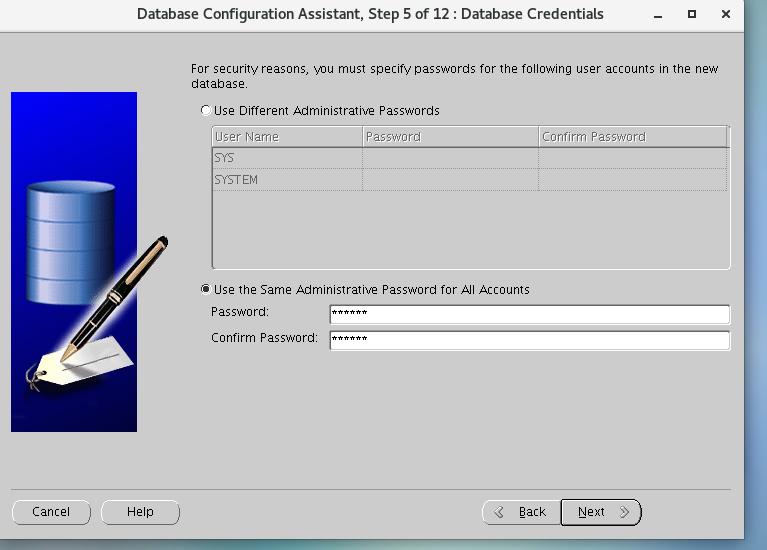
这里密码oracle


完成
配置网络
netca
lsnrctl start
lsnrctl stop
测试:linux用户oracle
export ORACLE_SID=suzhi
sqlplus / as sysdba
新建用户:
create user alex identified by alex;
grant dba to alex;